In my search for a good database GUI client for PostgreSQL, I came across a light-weight and elegant GUI client called Adminer. Adminer is a is a full-featured database management tool built with PHP.
Before Adminer, I used pgAdmin III. I hoped it’d be similar to PHPMyAdmin but it wasn’t nearly as good in terms of the user interface and functionality. I found it difficult to navigate and had to write queries to perform even basic tasks. Coming from PHPMyAdmin, this was a no no for me.
I’d used PHPMyAdmin (via XAMPP) for MySQL but decided to skip XAMPP when I moved from Windows to Ubuntu/Linux a few years ago. So I started using MySQL Workbench. I was also using MongoDB Compass (and Studio 3T briefly) for MongDB.
Now I use Adminer for all my DBs. I actively work with MySQL, PostgreSQL and MongoDB so this is really cool. So far, I’ve had zero issues with Adminer. It’s fast, simple and gets out of the way when I need to get stuff done.
In this article, I’ll show you how to setup Adminer on your machine.
Install PHP for your OS
- Installation instructions for Windows.
- Installation instructions for Mac.
- Installation instructions for Ubuntu/Linux.
NB: After installation, add the PHP CLI to your path if it’s not already added. You can test this by running php --version. You should get a similar result to the one shown below.
$ php --version
PHP 7.2.15-0ubuntu0.18.04.1 (cli) (built: Feb  8 2019 14:54:22) ( NTS )
Copyright (c) 1997-2018 The PHP Group
Zend Engine v3.2.0, Copyright (c) 1998-2018 Zend Technologies
    with Zend OPcache v7.2.15-0ubuntu0.18.04.1, Copyright (c) 1999-2018, by Zend Technologies
Install a DB server (optional)
Adminer currently supports MySQL, MariaDB, PostgreSQL, SQLite, MS SQL, Oracle, SimpleDB, Elasticsearch and MongoDB. If you want to use any of these databases locally, you need to install them on your machine.
You can also connect to a DB server on a remote machine (e.g a DigitalOcean VPS) or a managed DB service (e.g AWS RDS). In this case, you don’t need to install the DB server on your computer.
I’ll be demonstrating with MySQL here. If you want to follow along, you can install MySQL for your OS.
- Installation instructions for Windows.
- Installation instructions for Mac.
- Installation instructions for Ubuntu/Linux.
Install DB extensions for PHP (optional)
If you installed a DB server (the previous step), you might need to install the PHP extension for it and/or update your PHP config file.
Download and setup Adminer
Adminer is just one PHP file! You can download it from the Adminer website. The latest version at the time of writing this tutorial is 4.7.1. When you download the PHP file, you can put it anywhere you want. Mine is in a directory named adminer (i.e ~/dev/adminer) and is renamed to adminer.php.
Start up a terminal and change directory to the folder containing Adminer. In my case, it’s ~/dev/adminer. Now run PHP’s development server on a port of your choice.
~/dev/adminer$ php -S localhost:8080
PHP 7.2.15-0ubuntu0.18.04.1 Development Server started at Mon Mar  4 04:41:07 2019
Listening on http://localhost:8080
Document root is /home/nicholas/dev/adminer
Press Ctrl-C to quit.
Visit localhost on your browser (localhost:8080/adminer.php). You should be greeted by the screen below.
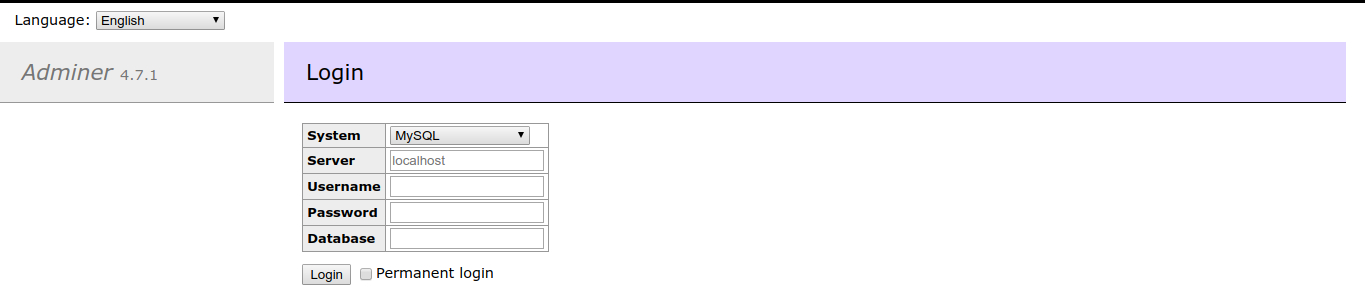
Now login to your DB. Mine is MySQL.
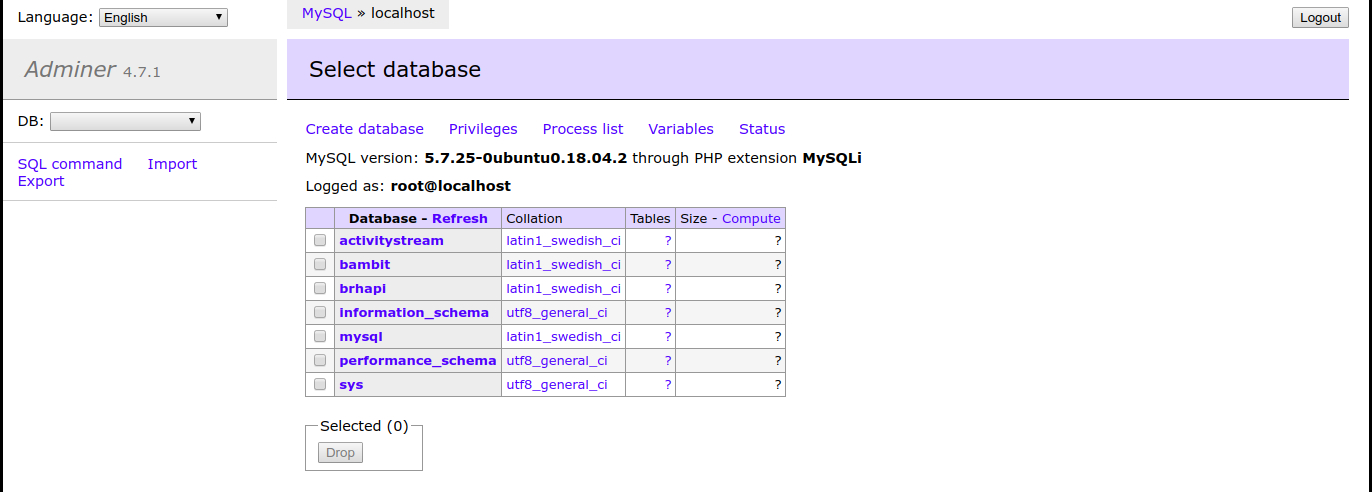
NB: Ensure your DB server is running. If you get an error like “None of the supported PHP extensions (MySQLi, MySQL, PDO_MySQL) are available” when trying to login, it means you didn’t install and/or configure the DB extension for PHP properly.
Extend Adminer with plugins
If you need more features on Adminer, you can use plugins. There are a ton of plugins already available and you can create yours if you want.
Let’s install one of the plugins: edit-textarea. It uses <textarea> for char and varchar
fields instead of the regular text input.
 char and varchar fields are edited in a text input by default
-
Create a plugins directory in your adminer directory (e.g
~/dev/adminer/plugins) and add this plugin.php file in it. plugin.php is required to use plugins with Adminer. -
Create an index.php file in your adminer directory (i.e
~/dev/adminer) and add the following code.<?php function adminer_object() { // required to run any plugin include_once "./plugins/plugin.php"; // autoloader foreach (glob("plugins/*.php") as $filename) { include_once "./$filename"; } $plugins = array( // specify enabled plugins here ); /* It is possible to combine customization and plugins: class AdminerCustomization extends AdminerPlugin { } return new AdminerCustomization($plugins); */ return new AdminerPlugin($plugins); } // include original Adminer or Adminer Editor include "./adminer.php"; ?> -
Add the edit-textarea plugin source file (edit-textarea.php) to your plugins directory.
-
Initialize the plugin in index.php by adding
new AdminerEditTextarea()in the$pluginsarray.$plugins = array( // specify enabled plugins here new AdminerEditTextarea(), ); -
Visit localhost:8080 (NOT localhost:8080/adminer.php) in your browser, login and check it out!
 Now you can edit using a text area
NB: To add a another plugin, all you need to do now is place the plugin source file in the plugins directory and initialize it with the new keyword in the $plugins array (in index.php) e.g new SomeAwesomePlugin().
Last modified on 2019-04-21