All parts
- Build a Facebook clone from scratch with PHP — Part 1
- Build a Facebook clone from scratch with PHP — Part 2 (this article)
- Build a Facebook clone from scratch with PHP — Part 3
- Build a Facebook clone from scratch with PHP — Part 4
- Build a Facebook clone from scratch with PHP — Part 5
- Build a Facebook clone from scratch with PHP — Part 6
- Build a Facebook clone from scratch with PHP — Part 7
A little about PHP and MySQL
So in part 1, we didn’t get to talk about PHP as we should have because we were all about the FaceClone template. We also didn’t get to talk about MySQL, the database we’ll be using. Let’s quickly get to know a little about PHP and MySQL.
PHP
PHP (recursive acronym for PHP: Hypertext Preprocessor) is a widely-used open source general-purpose scripting language that is especially suited for web development and can be embedded into HTML. - http://php.net/manual/en/intro-whatis.php
PHP is the most popular server-side programming language for the web and runs millions of websites. To write PHP, all we need to do is create a file with a .php file extension and add the php tags <?php and ?>. <?php is the opening tag and ?> the closing tag. We can write a Hello World PHP program like so:
<!DOCTYPE html>
<html>
<head>
    <title></title>
</head>
<body>
    <?php echo "Hello World"; ?>
</body>
</html>
In the above example, the PHP code is embedded in HTML. When PHP parses a file, it looks for opening and closing tags, <?php and ?> which tell it to start and stop interpreting the code between them. We could decide to write PHP-only code too:
<?php
    echo "Hello World";
?>
We may choose to omit the closing tag ?> in this case to have:
<?php
    echo "Hello World";
echo prints out Hello World as HTML text when the php file is served. We’ll be learning PHP as we go about building FaceClone. Don’t worry, PHP is pretty easy! 👍
MySQL
MySQL is the fastest growing open-source relational database management system. It is a popular database of choice for use in web apps and is currently used by many large websites like Facebook and Twitter. It makes use of SQL, a language for managing data in relational databases. SQL is an abbreviation which stands for Structured Query Language. We’ll be writing SQL queries along side PHP. SQL databases contain tables. Think of a table as an Excel spreadsheet. For our app, we’ll create tables like users (to store information about our users) and posts (to store our users’ posts). Tables have columns. For a users table, we could have columns like name, password, email etc. Then each row of the users table could contain details about a user under each column heading. Say we want to get all the posts made by FaceClone users, we could write a query like this:
SELECT * FROM posts
SELECT lets us read data from the database. * gets all the columns in the table posts. We could use SELECT name, email FROM posts if we don’t want all the columns from the posts table. We’ll be dealing with more SQL queries as we build FaceClone. SQL is easy as well, plus there are a ton of query snippets online for most queries you’ll want to write. Sweet!!!
Back to business…
When we changed our template files from .html to .php, we broke our navigation links. Let’s go ahead and fix that. We just need to change the href attributes of those links to .php. Or not. We have 3 templates and need to make each change 3 times. That’s not much of a problem since there are only 3 templates. What if there were 10, 15, 20? It doesn’t make sense to make the same change x times. The navigation bar is a component we use in all of our templates. Why don’t we make it reusable?
Partials
We can achieve reusability by creating partials. Partials are files that contain different components of our app. So we can have a header partial and a footer partial. If we need a header in home.php, all we need to do is simply “include” it. Let’s go ahead and do that. Create a header.php and footer.php file in the same folder as your other templates. It may be more efficient to create a folder for partials but we’ll just have the templates and partials together for now. In your header.php, add the following code (the snippet below can be gotten from home.php or profile.php):
<!DOCTYPE html>
<html>
<head>
<title>FaceClone</title>
<link rel="stylesheet" type="text/css" href="css/bootstrap.min.css">
<link rel="stylesheet" type="text/css" href="css/style.css">
</head>
<body>
<!-- nav -->
<nav class="navbar navbar-default">
    <div class="container-fluid">
    <div class="navbar-header">
        <a class="navbar-brand" href="index.html">FaceClone</a>
    </div>
    <ul class="nav navbar-nav navbar-right">
        <li><a href="home.html">Home</a></li>
        <li><a href="profile.html">Profile</a></li>
        <li><a href="#">Logout</a></li>
    </ul>
    </div>
</nav>
<!-- ./nav -->
Then in footer.php add:
<!-- footer -->
<footer class="container text-center">
    <ul class="nav nav-pills pull-right">
    <li>FaceClone - Made by [your name here]</li>
    </ul>
</footer>
<!-- ./footer -->
<script type="text/javascript" src="js/bootstrap.min.js"></script>
<script type="text/javascript" src="js/script.js"></script>
</body>
</html>
Now instead of making a change in 3 places, we can make just one change in header.php. Change the nav link hrefs to .php so href="home.html" becomes href="home.php" for example.
We’ve just created 2 partials. We need to include them in all our template files. To do so, clear the header and footer code (which we’ve already moved to header.php and footer.php respectively) in our template files and add <?php include "header.php"; ?> and <?php include "header.php"; ?> like so:
<?php include "header.php" ?>
<! - main -->
<main class="container">
<!-- page content here -->
</main>
<!-- ./main -->
<?php include "footer.php" ?>
Run PHP’s development server to to confirm everything works fine.
NB: Open up a terminal and change directory to the project’s folder then run php -S localhost:8080 to start the server (refer to part 1 if you don’t remember how to run the app).
Let’s write a DB schema
We need to “architect” a schema for our database. There’s quite some data that needs to be stored. When a user makes a post, we need to store it so they (and other users) can view it [later]. We even need to store information about users like their usernames and passwords. There needs to be some structure. We must know before hand what data we want to store and how we want to store it. A schema is simply a representation of a database structure. Smooth and easy!
Here’s the schema I made for FaceClone:
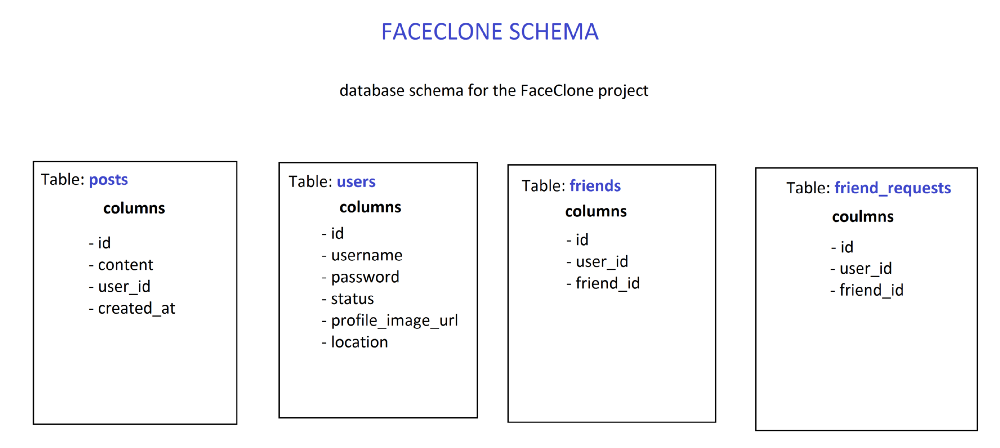
This schema is very basic. I should have specified the data types for each column. But don’t worry, we’ll choose data types when we transform this schema into a real database. The column names suggest the data that would be stored under them. The id columns allow us uniquely identify records in the database. If we want to get a post from the database, we need a unique feature that identifies it - the id. For the users table, we could use the username column to identify users because each user’s username must be unique but we’ll be using ids nonetheless.
The user_id and friend_id columns are foreign key columns. user_id represents a user in the users table. Every post, for example must belong to a user. Instead of adding fields like username, password, location etc to the posts table to represent the user who made a given post, we can simply add a reference (user_id) which represents a user’s id in users table. This is some form of normalization and in helps us avoid redundancy/duplicate data.
Create the Database
With a schema in sight, we should get started creating the database for FaceClone. Power up XAMMP to begin. When XAMPP is executed, a view like the one below greets you:
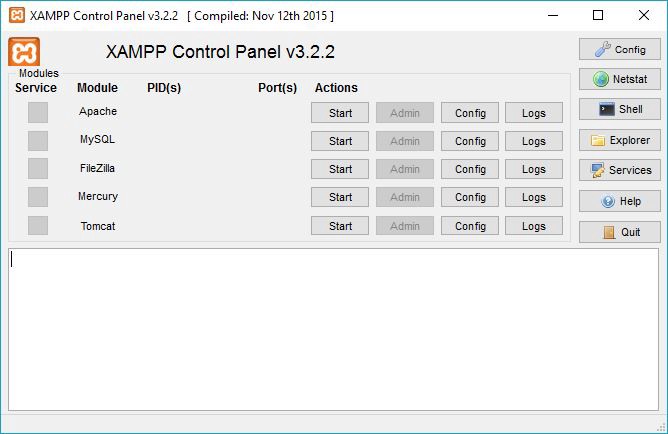 XAMPP
XAMPP
Start Apache and MySQL. We’re going to use a web app called PHP My Admin to create our database. We’ll serve PHP My Admin with Apache (a web server). We also need MySQL server running too. Once Apache and MySQL start running, go to your browser and visit http://localhost/phpmyadmin. You should be greeted by a page that looks like:
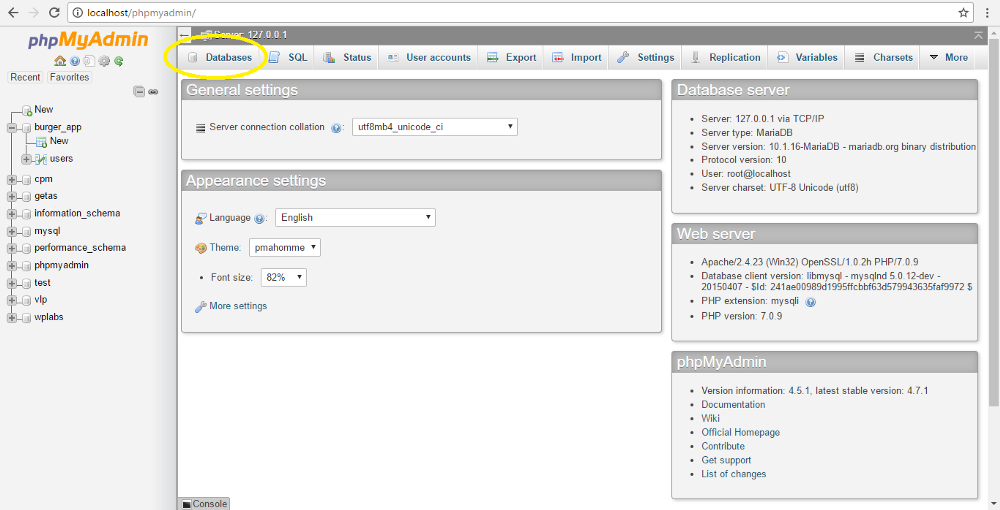 PHP My Admin
Click on the databases tab to create a new database. Let’s call our database faceclone. Once our database is created, we are taken to a screen where we can create tables. Type in the name of the table and the number of columns and click “Go”. Our posts table for instance would have 4 columns: id, content, user_id and created_at. Go ahead and create all the database tables like so:
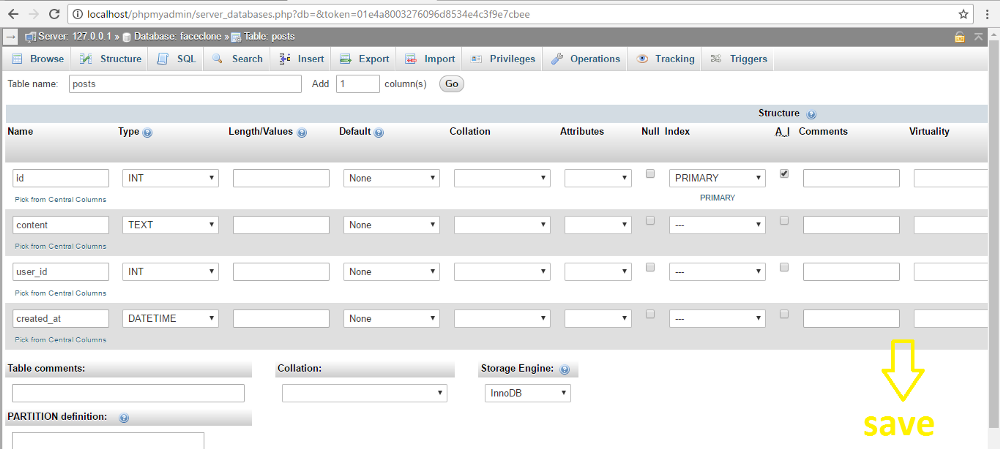 Create posts table
NB: For id columns, remember to make the index PRIMARY and tick the AI (auto increment) checkbox.
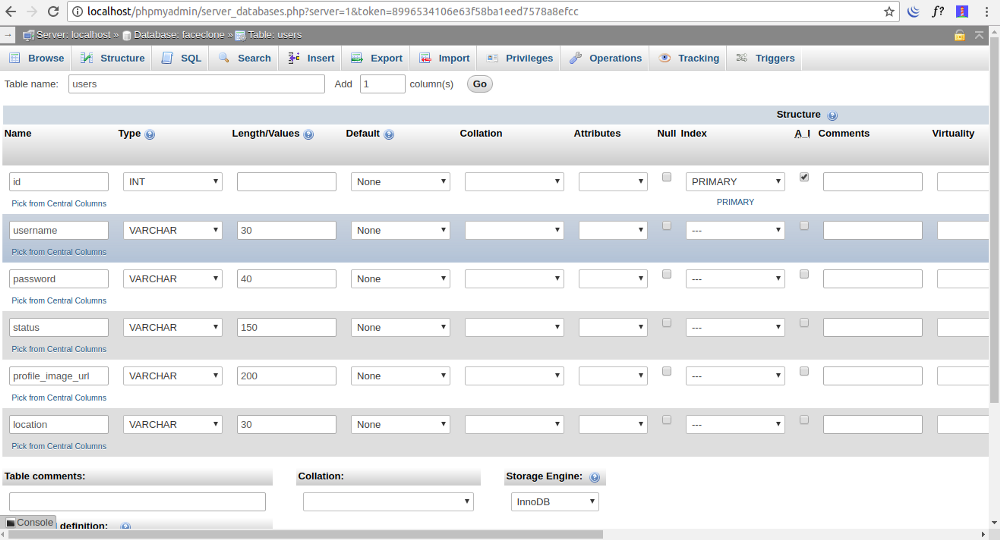 Create users table
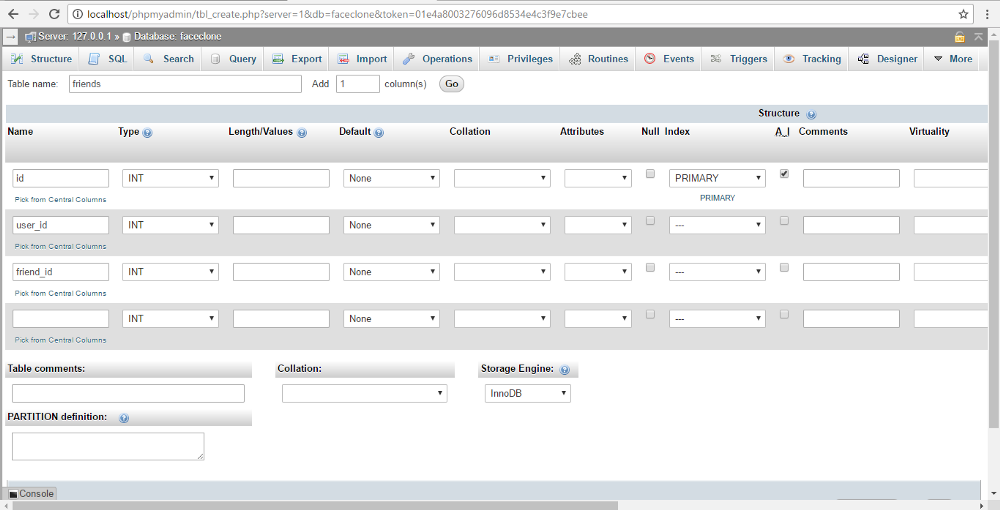 Create friends table
 Create friend_requests table
Done with that? Cool. Our database is up and ready!
That wraps it up for part 2!!!
The final code for this part is contained in my FaceClone repo here: https://github.com/nicholaskajoh/faceclone. Visit the link and click on the part-2 folder to see progress made so far.
Next: Build a Facebook clone from scratch with PHP — Part 3.
Previous: Build a Facebook clone from scratch with PHP — Part 1.
Last modified on 2023-03-14