All parts
- Build a Facebook clone from scratch with PHP — Part 1
- Build a Facebook clone from scratch with PHP — Part 2
- Build a Facebook clone from scratch with PHP — Part 3 (this article)
- Build a Facebook clone from scratch with PHP — Part 4
- Build a Facebook clone from scratch with PHP — Part 5
- Build a Facebook clone from scratch with PHP — Part 6
- Build a Facebook clone from scratch with PHP — Part 7
Posts are the heart and soul of Facebook. In this part, we’ll be writing code that would allow us view, make and delete posts on FaceClone.
Functions.php
In the spirit of code reusability A.K.A writing DRY (Don’t Repeat Yourself) code, let’s create a functions.php file in the root of our project. We’ll use this file to write different bits of code — functions — which can be used across our app. Now include functions.php at the top of all app pages like so:
<?php require_once "functions.php"; ?>
Connect to DB
To interact with a database e.g perform CRUD (Create, Read, Update, Delete) operations, we must connect to it. Connecting to MySQL with PHP is pretty easy. Create a function in functions.php called db_connect and add the following code like so:
<?php
    function db_connect() {
        global $conn; // db connection variable
        $db_server = "localhost";
        $username = "root";
        $password = "";
        $db_name = "faceclone";
        // create a connection
        $conn = new mysqli($db_server, $username, $password, $db_name);
        // check connection for errors
        if ($conn->connect_error) {
            die("Error: " . $conn->connect_error);
        }
        // uncomment the line below to confirm a connection is established
        // echo '<h1 style="color: green;">Connected to DB!</h1>';
        // your can clear these comments afterwards
    }
You can call this function in any page like so:
<?php require_once "functions.php"; ?>
<?php include "header.php"; ?>
<?php
    db_connect();
?>
<!-- main -->
<main class="container">
...
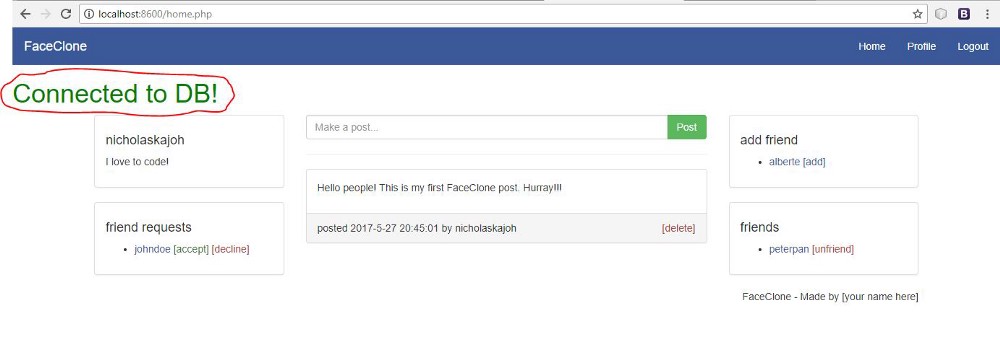 Connect FaceClone to the DB
The above code is quite self-explanatory. We specify our database server name, username, password and the particular database we want to access. Then, we use the MySQLi extension to establish a connection to the database. There are other extensions and therefore ways to connect to a database. Also, we can choose to write the code procedurally or using object-oriented programming.
Ensure your MySQL server is running. You can start the server from XAMPP’s control panel.
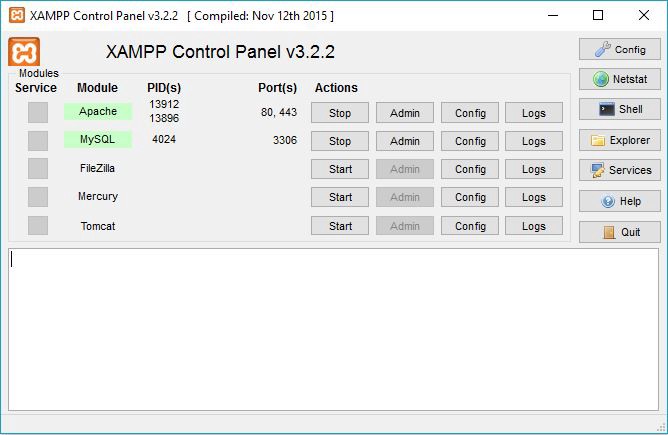 XAMPP control panel
Now that we have a connection, let’s write code to get posts from the database. Wait! There’s no data in there, is there? Let’s quickly generate some data. Head over to PHP My Admin and have some fun.
Go to faceclone > posts > insert…
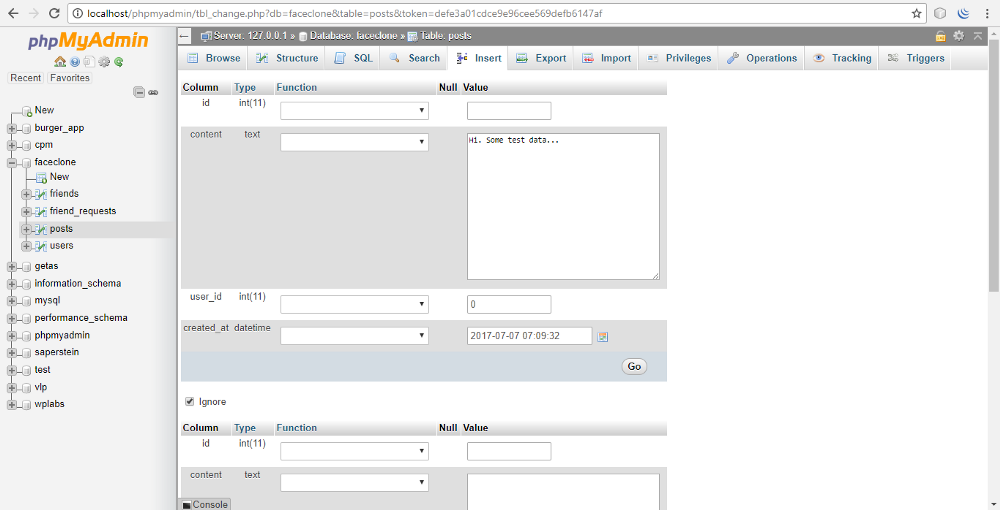 Add dummy data to your DB
NB: I set user_id to 0 cos we don’t have any users yet.
View posts
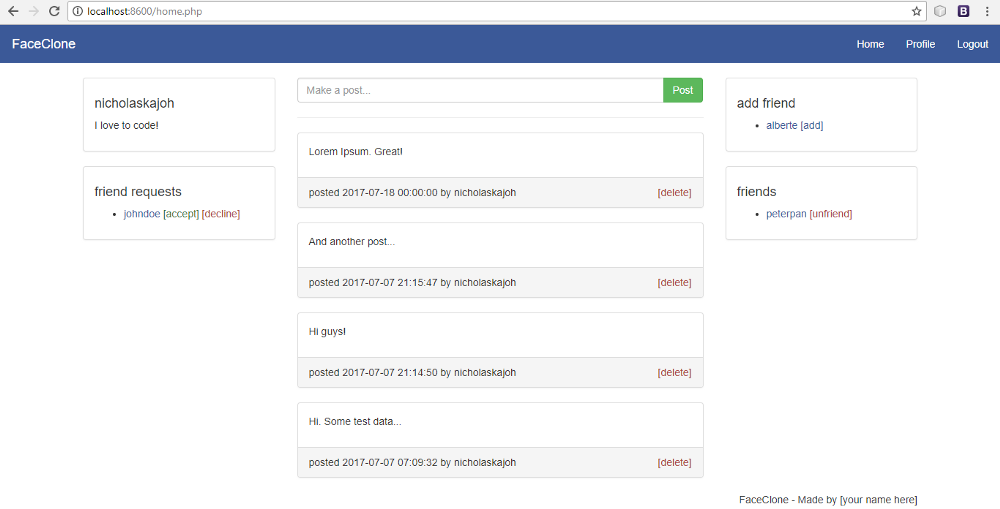
Now, let’s get the posts from the DB to our home page. There’s already template code for posts with some static data. Using the template, we’ll have something like this:
<!-- post -->
<?php
    $sql = "SELECT * FROM posts";
    $result = $conn->query($sql);
    if ($result->num_rows > 0) {
        while($post = $result->fetch_assoc()) {
?>
            <div class="panel panel-default">
            <div class="panel-body">
                <p><?php echo $post['content']; ?></p>
            </div>
            <div class="panel-footer">
                <span>posted <?php echo $post['created_at']; ?> by nicholaskajoh</span>
                <span class="pull-right"><a class="text-danger" href="php/delete-post.php?id=<?php echo $post['id']; ?>">[delete]</a></span>
            </div>
            </div>
<?php
        }
    } else {
?>
        <p class="text-center">No posts yet!</p>
<?php
    }
    $conn->close();
?>
<!-- ./post -->
Nothing much here. First, we write an SQL query and execute it, then we get the results and display each post using a while loop. The query SELECT * FROM posts simply says “get all the records from the posts table”.
Tip: The words (in the code) with $ before them are variable names (e.g $result). We use the dollar sign to denote variable names in PHP.
We’re not done yet though. Wouldn’t it be better to display the more recent posts first? We can do that by adjusting our query a little bit.
SELECT * FROM posts ORDER BY created_at DESC
Bingo!
Make posts
We don’t expect users to use PHP MyAdmin to make posts on FaceClone, do we? It only seems logical that we allow users create posts in our app. Thanks to the template, we have a nifty little textbox on the home page.
This point in our journey looks like a good time to separate concerns. We could write the code that’ll create a new post in home.php, but this can lead to messy code as there may be too many moving parts, so to speak, in one file. Let’s avoid this by creating a new folder called php in the root of our project to store php files which aren’t pages. functions.php fits the description of a file that should be in the php folder. Let’s leave it where it is, though. I like to keep it in the root folder as it serves kind of like a general purpose.
Create a new file in the php folder called create-post.php and add the following code:
<?php
    require_once "../functions.php";
    db_connect();
    $sql = "INSERT INTO posts (content, user_id) VALUES (?, 0)";
    $statement = $conn->prepare($sql);
    $statement->bind_param('s', $_POST['content']);
    if ($statement->execute()) {
        redirect_to("/home.php");
    } else {
        echo "Error: " . $conn->error;
    }
    $conn->close();
Now edit the form in home.php by adding php/create-post.php as the value for the action attribute.
<!-- post form -->
<form method="post" action="php/create-post.php">
<div class="input-group">
    <input class="form-control" type="text" name="content" placeholder="Make a post…">
    <span class="input-group-btn">
    <button class="btn btn-success" type="submit" name="post">Post</button>
    </span>
</div>
</form><hr>
<!-- ./post form -->
The code to create a post is straightforward. We write a query and execute it. If it’s executed (meaning everything went well), we redirect to the home page where we can see the newly created post. Else, we throw an error.
$_POST is a superglobal. superglobals are variables that are always accessible regardless of scope i.e you can access them from any function, class or file without having to do anything. $_POST is an array that contains data sent in POST requests. When a user submits the form to create a post, we can access the content in $_POST variable using $_POST['content'].
NB: Ensure the default value for the created_at column of the posts table is set to CURRENT_TIMESTAMP.
The redirect_to method is a custom method. Add the definition to functions.php.
function redirect_to($url) {
    header("Location: " . $url);
    exit();
}
Delete posts
Create a new file in the php folder. Call it delete-post.php. Similar to create-post.php, we have:
<?php
    require_once "../functions.php";
    db_connect();
    $sql = "DELETE FROM posts WHERE id = ?";
    $statement = $conn->prepare($sql);
    $statement->bind_param('i', $_GET['id']);
    if ($statement->execute()) {
        redirect_to("/home.php");
    } else {
        echo "Error: " . $conn->error;
    }
    $conn->close();
Now when we click the delete link for a post, it’s gone for good! 😊
$_GET is another superglobal. As you might imagine, it contains data sent from GET requests.
That’s it for part 3!
The final code for this part is contained in my FaceClone repo here: https://github.com/nicholaskajoh/faceclone. Visit the link and click on the part-3 folder to see progress made so far.
Next: Build a Facebook clone from scratch with PHP — Part 4.
Previous: Build a Facebook clone from scratch with PHP — Part 2.
Last modified on 2023-03-14