As your app grows (by getting more traffic, users, data etc), the need to increase its capacity or scale arises.
One way to scale is by optimizing your code. That may involve removing unnecessary code, using better algorithms or even using a faster programming language. While it’s important to optimize the code in your app, there’s only so much the machine in which your app runs can do. The next logical step is to increase your server capacity.
There are mainly two ways to go about it — juice up a single server or run your app on multiple servers.
The former is called vertical scaling and involves adding more memory, compute and/or storage to your server. This is very easy to accomplish if you run your app on a PaaS or IaaS platform. However, there’s only so much RAM/CPU/SSD etc you can get on one machine. Also, running high-end hardware is usually very expensive.
The latter approach is called horizontal scaling. It involves running your application on multiple servers and sharing traffic/load among them. Using this approach has some advantages. For one, you can scale infinitely. You just add more servers. Also, your app becomes highly available because if one server crashes/goes offline, you have other servers to handle incoming requests and/or other workloads.
Horizontal scaling works by placing a load balancer in front of your app servers. A load balancer is also a server. Its primary job is to distribute traffic among other servers.
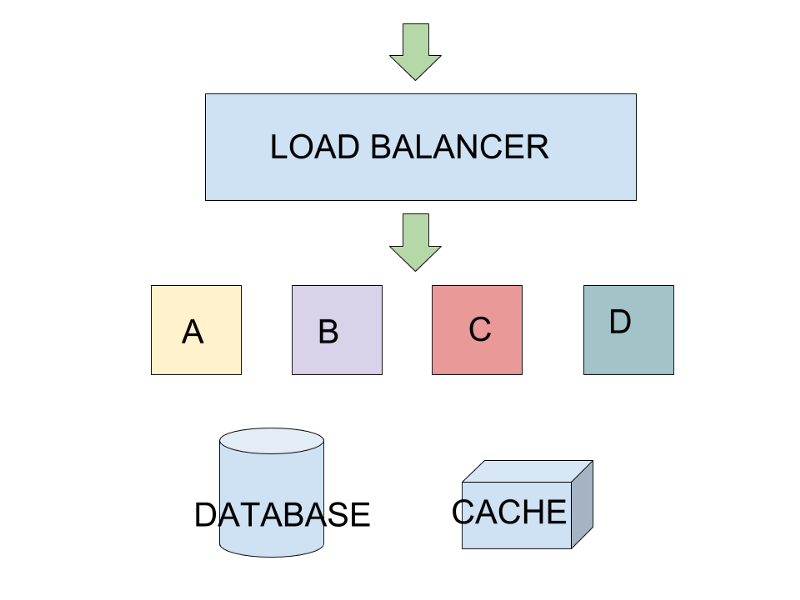 Horizontal scaling (A, B, C and D represent your app servers)
Most cloud providers have one-click-setup load balancers you can use if you run your app in their infrastructure. You may also choose to create your own load balancer using open source software like Nginx, HAProxy, Traefik etc.
In this tutorial, we’re going to scale an app horizontally on DigitalOcean using their cloud load balancer. Let’s do this!
The hits app
The app we’ll be scaling in this tutorial is called hits. It’s a simple Flask (Python) app that displays page hits. It counts every page load as a hit, and stores and caches the count in a PostgreSQL and Redis database respectively.
hits source code: https://github.com/nicholaskajoh/hits.
The hits app is containerized using Docker for easy development and deployment. Knowledge of Python/Flask or Docker is not required to follow through in this tutorial. There are simple instructions provided in the README of the source code to run the app both locally and online.
DigitalOcean
DigitalOcean is a popular cloud computing platform loved for its simplicity and pocket-friendly pricing. We’ll be using their VMs/servers (which they call Droplets) to run the hits app.
You’ll need to create an account on digitalocean.com to get started. Droplets start at $5 per month but coupons abound. You can use my referral link and get $10 free: https://m.do.co/c/e38dd092b1ad. More coupons here: https://gist.github.com/dexbyte/fb13e994ad180ce86c654cae1ce7d14f.
Droplets
Once you’ve signed up, verified your account and redeemed/purchased credits, head over to https://cloud.digitalocean.com and create a new droplet.
 My droplets are already up 😉
You can choose the configs you want if you know your way around provisioning servers. If you don’t, you may use the options shown in the screenshot below.
 Create a droplet
When your servers are up, you’ll need to connect to them via SSH. It’s advisable to generate an SSH key for your computer (https://www.digitalocean.com/community/tutorials/how-to-set-up-ssh-keys-on-ubuntu-1604). Alternatively, you can use username and password to login to your droplets.
Setup
Here are the steps (in summary) to setup hits on your droplet. You may use tmux to perform the steps simultaneously on multiple servers.
- SSH into the droplet as root (user) using
ssh root@DROPLET_IP_ADDRESS. Windows users may need an SSH client like PuTTY (https://www.howtogeek.com/311287/how-to-connect-to-an-ssh-server-from-windows-macos-or-linux/). - Create a non-root user and login as that user (https://www.digitalocean.com/community/tutorials/initial-server-setup-with-ubuntu-16-04)
- Clone the hits repo into your server with
git clone [https://github.com/nicholaskajoh/hits.git](https://github.com/nicholaskajoh/hits.git.). DigitalOcean droplets come with Git pre-installed so you don’t need to install it. PS: You can clone the project anywhere you like. I cloned mine in /var/www. You can do the same with this command:sudo mkdir /var/www && sudo chown ${USER}: /var/www && sudo chmod u+w /var/www && cd /var/www && git clone [https://github.com/nicholaskajoh/hits.git](https://github.com/nicholaskajoh/hits.git.). - Create a .env file in the project root. You can either copy .env.example to .env and make edits or create the file from scratch then add the environment variables. Use nano to edit/create the file:
sudo nano .env. My .env own file is shown in a screenshot below. I used a managed database service for both PostgreSQL (ElephantSQL) and Redis (Redis Labs). Make theINSTANCE_IDenvironment variable unique for each droplet. - Install Docker and Docker Compose (https://www.digitalocean.com/community/tutorials/how-to-install-and-use-docker-on-ubuntu-16-04, https://www.digitalocean.com/community/tutorials/how-to-install-docker-compose-on-ubuntu-16-04). You can test your installations by running
docker --versionanddocker-compose --version. Ensure the docker service is running:sudo systemctl status docker. - Build and run the hits application:
docker-compose -f docker-compose.prod.yml up --build -d(you should be in the root directory of the project (/www/var/hits). Now when you visit, your droplet’s IP address, you should be greeted by the hits app.
 The hits app 🙌
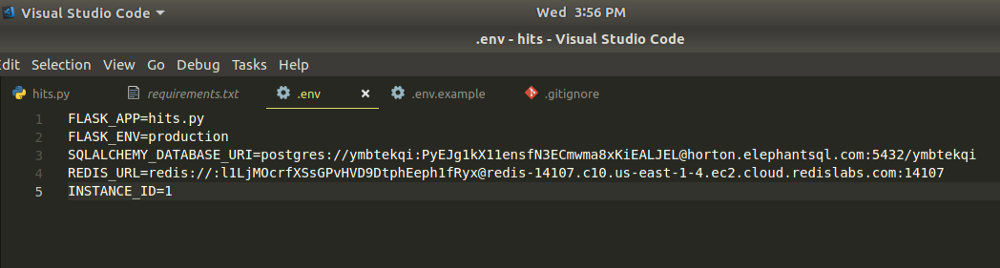 My .env file for hits app in production (if you’re reading this, the postgres and redis dbs have already been destroyed 👀)
Load balancer
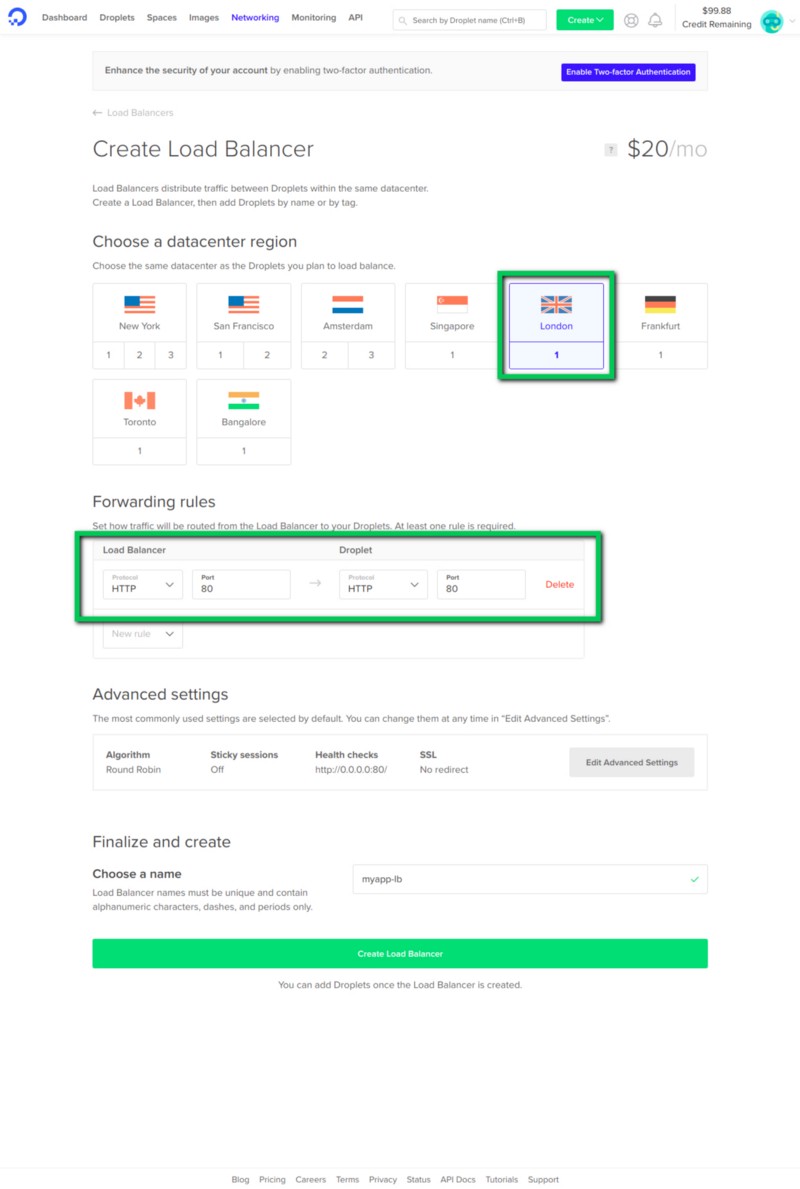
Once all your servers are up and running, create a new load balancer.
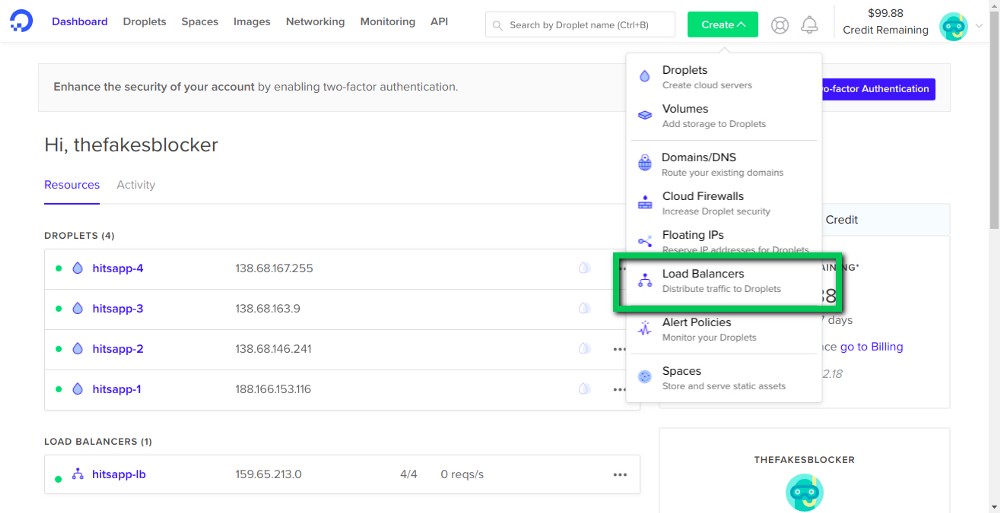
Once your load balancer is up, add your droplets to it.
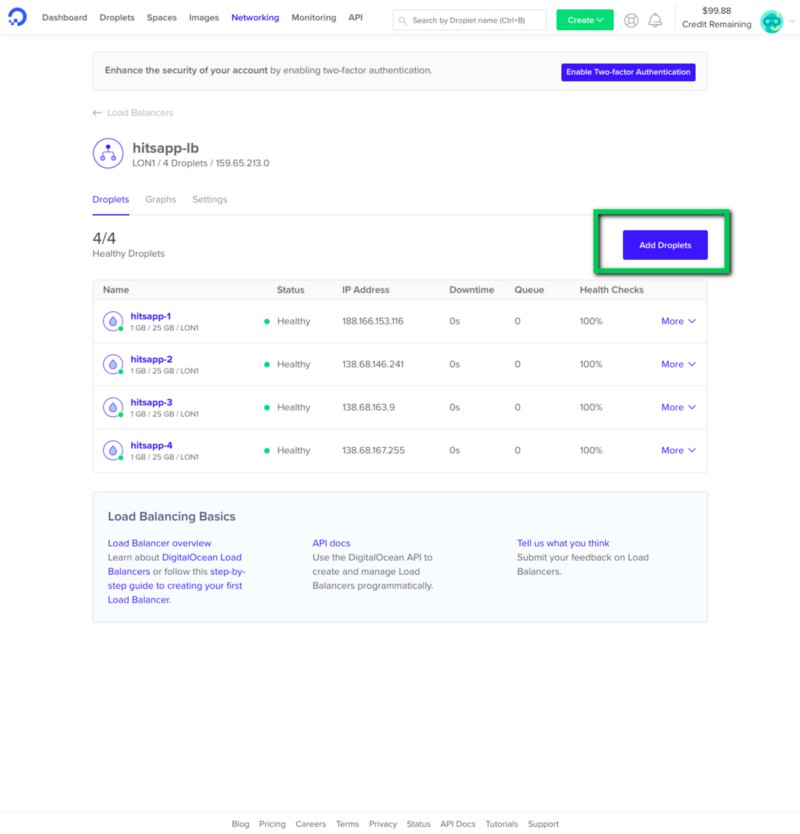
Now you can visit your load balancer’s IP address. The APP INSTANCE shows what instance of the application (droplet) a request was routed to.
Let’s go into the settings of the load balancer for a bit…
 Load balancer settings
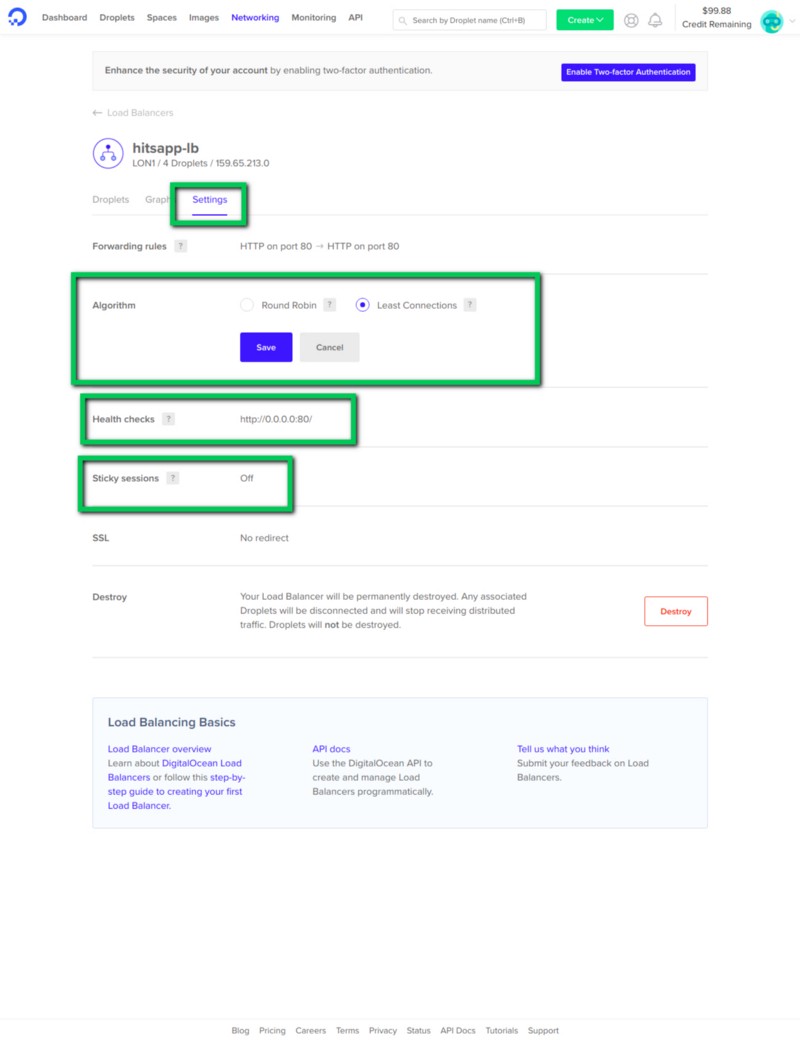
So DigitalOcean gives us options to customize our load balancer.
We can choose an algorithm for the load balancer to use to route traffic to the droplets. There’s Round Robin and Least Connections. In Round Robin, the requests are routed in a circular order from one droplet to the next. On the other hand, Least Connections routes to the server with the least traffic.
There’s also health checks. You can set an endpoint e.g your app’s home page (http://0.0.0.0:80) for the load balancer to test and see if the server is running. If the server crashes or is offline, the load balancer would know and not send traffic to the server until it’s back up.
With Sticky sessions, you can glue a user to a particular server. If enabled, after a user’s first request, follow up requests would be routed to the same server.
Last modified on 2023-03-14