Managing files/images can be a hassle. It can be a real pain to have to deal with uploads, storage, manipulation, administration and delivery of media content in every project you start/or are involved in.
Luckily, there are cloud platforms that take away the stress of all that, allowing you to ship faster and deliver your product(s) at scale. Cloudinary is one of such platforms. It tags itself as the media management platform for web and mobile developers — an end-to-end solution for all your image and video needs.
Aside Cloudinary’s easy to use API, I was attracted by their very generous free plan. See for yourself at https://cloudinary.com/pricing.
Learn more about Cloudinary: https://cloudinary.com/solutions.
This is a quick tutorial on how setup image upload with Django and Cloudinary. Let’s roll…
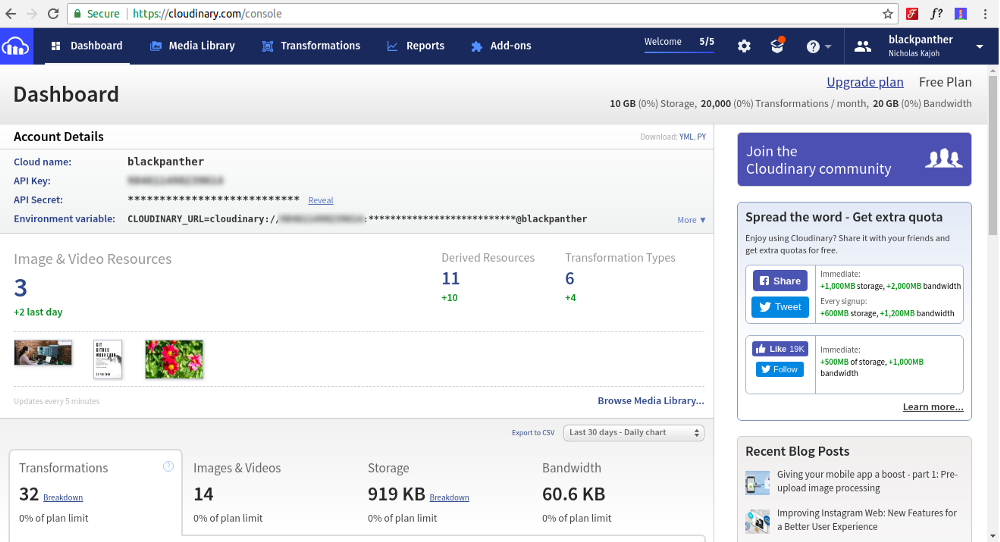
Console
Visit Cloudinary.com and create an account or login if you already have one. You’ll be provided a nice dashboard/console at https://cloudinary.com/console. There you’ll find your account details i.e cloud name, API key and secret.
Install
Cloudinary has an open source integration library for Python/Django. Install it using pip.
$ pip install cloudinary
Settings
Go to your project’s settings.py and make the following additions.
First import cloudinary.
import cloudinary
Then add cloudinary to installed apps.
INSTALLED_APPS = [
    'cloudinary',
    # other apps
]
Now add the configs from your console.
cloudinary.config(
    cloud_name = CLOUDINARY_CLOUD_NAME,
    api_key = CLOUDINARY_API_KEY,
    api_secret = CLOUDINARY_API_SECRET
)
Replace CLOUDINARY_CLOUD_NAME, CLOUDINARY_API_KEY and CLOUDINARY_API_SECRET as appropriate (they should be in quotes e.g cloud_name = "tchalla").
Models
At any point and in any file in your Django project, you can easily make use of all the functions and classes the Cloudinary Python library provides. For instance, you can upload a file like so.
import cloudinary.uploader

cloudinary.uploader.upload("my_picture.jpg")
See https://cloudinary.com/documentation/django_image_upload for more info on uploads.
However, you want to handle things the Django way as this would allow you utilize the rich APIs that Django ships with. By “the Django way”, I mean using models (in this case).
In Django, you can use ImageField or FileField in your model. Cloudinary provides CloudinaryField. Let’s create a Photo model using CloudinaryField in models.py.
from django.db import models
from cloudinary.models import CloudinaryField

class Photo(models.Model):
    image = CloudinaryField('image')
    caption = models.CharField(max_length=100, blank=True)

    def __str__(self):
        return self.caption if self.caption != "" else "No caption"
Additionally, if you want to delete an image from Cloudinary when it’s model instance is deleted in your app (Django/Cloudinary doesn’t do this by default), you can add the following pre-delete signal after your model definition.
@receiver(pre_delete, sender=Photo)
def photo_delete(sender, instance, **kwargs):
    cloudinary.uploader.destroy(instance.image.public_id)
Then add the following imports at the top of the file.
from django.db.models.signals import pre_delete
import cloudinary
Forms
Using ModelForm to create a form from the Photo model, we have:
from django.forms import ModelForm
from .models import Photo

class PhotoForm(ModelForm):
    class Meta:
        model = Photo
        fields = ('image', 'caption')
Views
For the view of PhotoForm form, we could have:
from django.shortcuts import render, redirect
from .forms import PhotoForm
from .models import Photo

def add_photo(request):
    if request.method == "POST":
        form = PhotoForm(request.POST, request.FILES)
        if form.is_valid():
            photo = Photo()
            photo.caption = request.POST.get('caption')
            photo.save()
            return redirect('/photo/' + photo.id)
    else:
        form = PhotoForm()

    return render(request, 'add-photo.html', {'form': form})
Template
In the upload form template, you can simple do {{ form }} or manually design the HTML form to your taste.
Display
Displaying images from Cloudinary in your app is super simple and straight forward. If we fetch a Photo model instance in a view using photo = Photo.objects.get(id=1), we can retrieve the image with photo.image which returns a CloudinaryResource object. This object has properties such as public_id, url, size (bytes), format etc.
One way to display the image in a template after passing the photo object from the view is to use the url property.
<img src="{{ photo.image.url }}">
This is great and all but it won’t afford us the opportunity to use the many image transformation options Cloudinary provides. Fortunately, the Cloudinary library provides a template tag we can load up and use.
{% load cloudinary %}{% cloudinary photo.image.public_id className="my-class" height=200 width=100 %}
This template tag allows you to not only specify any Cloudinary transformation parameter, but also to specify regular HTML image tag attributes (like title and alt). For instance, we specified the class (className) my-class in the snippet above. This actually generates an image tag. E.g
<img class="my-class" src="https://res.cloudinary.com/demo/image/upload/h_200,w_100/sample.jpg" height="200" width="100">
Read about all the transformation parameters available here: https://cloudinary.com/documentation/image_transformations.
That’s it!
Last modified on 2023-03-14